Recent: Trayford close coupled toilet?

Mend Miele Washing Machines

Mend Household Appliances, Washing Machines
Find out how to mend it for free.

Ask Question
Mend Household Appliances, Washing Machines
Mend repair fix Miele washing machines

Mend > Washing Machines

Mend Household Appliances, Washing Machines

Miele WT 745?

How can I open the front panel on my washing machine so that I can clean out clinging soap

C L Fitch
February 2006
Machine not washing well and not spinning. Just noticed my reply above some time ago. I've had my machine now for 25 years, no very costly repairs yet.
This week I replaced 220uf 40v capacitor which was reading 80uf on the controller board. This improved the machines washing but did not cure it. Having bought a spare machine for ÂŁ1.00 years ago I replaced the controller board to save time tracing which other components may be faulty. My machine now works perfectly.

OM
January 2022
Thank you Neil.
I had repaired my Miele WT745 in 2019, about a year ago. Not spinning and a bit erratic. During some wash cycles the machine chugged, appeared to have difficulty turning during wash cycle. This was the first major problem. I checked the main motor brushes, they still had life in them, but replaced them anyway. Eventually I read about the balance unit/pressure sensor. On checking the hose from the door rubber seal to balance unit/pressure sensor I unclipped the hose, which is roughly 7cm with a 90 degree bend measuring 2.5cm. The hose was completely blocked with a date seed and the screw tip from a ball-point pen which were trapped at this bend. With grime the hose was air/water tight and I could not blow through it. When these were removed the machine worked well again, first repair in 21 years. All work was carried out from the bottom opening of the machine. I too am getting on an did not see the signs, which are obvious, that the front/door swings open.
Same problem with spin recently despite ensuring pockets are checked. Used descaler, machine worked a couple of times and problems persisted. Replaced shock absorbers that were purchased when I had the initial problem thinking that they may be the cause. Washing fine but not spinning. Machine attempted to spin then did everything but spin. Again working from beneath machine I removed and cleaned pump, which did not really need it, hose from door seal to pressure sensor/balance unit was clean with no obstruction. I then removed the plastic pipe connecting the door seal and hose to pressure sensor, it was blocked air tight. I initially thought what I saw was a mesh in the pipe, but recalling the previous block determined if this was a mesh the date seed and pen tip would not have got through. Gently forced the obstruction out and saw what appeared to be central indentations at either end which could be a hole. This was blocked, air tight. Scraping what was almost like concrete the hole was eventually opened and left in Viakal overnight. In the morning after examining the lug closely noted it had screw threads in the hole and was knurled on the outer diameter. It was conical in shape which allowed it into the pipe and to wedge tight within it. This may also have been a remnant from the first obstruction but having a hole went unnoticed. I must have placed this in a pocket and the lug found it's way into the machine. This was probably a lug from a computer housing that had come adrift and was was to be glued back into the computer housing.
I was having difficulty replacing the hose clips to the door seal pipe connector junction from beneath the machine and searched youtube and the web and read your article on opening the front of a Miele. My machine is now gaping open waiting to be reassembled. I have every confidence that now with water getting to the pressure sensor, all obstructions removed, all will be well, as before.
The other gift I found was Miele included a circuit diagram in a plastic wallet attached to the inside of the door.
I hope this will/may help someone with spin problems and soggy clothes at the end of a wash.

Oliver MacDonald
January 2020
My Miele 745 will not fill with water for a wash cycle but will fill on a rinse cycle,

rick
June 2014
Hello,
My Miele WT 745 washes good but doesn't dry yhe wash. Th heater works well but I can't hear the fan spinning. Please help

Jef

jef ackermans
December 2013
I need to replace the door seal on my W460S can any one help?

Martin H
February 2012
I need to replace the inner drum bearings and seal on my miele w700 washing machine how do I go about it

William Doherty
December 2010
I had a leaking Miele W840. I followed the instructions of A D King step 1 to 8 to open the machine and found that the dispenser to tub hose was not fixed to the powder dispenser. I just fastend the hose again and the machine was fixed.

I have added some photos on flicker. Go to http://www.flickr.com and search for Miele W840. This is to illustrate some parts. You can see a photo of the spring loaded clip at the bottom of the front door and the emergency door opener.

The entire repair took less than half an hour and did not require any spare parts.

Lennart Agestam
December 2010
The procedure below worked great for my W698 (quite old now ~18 years but first seal change, actually 1st maintainance ever!).
Couple of clarifications -
I would recomend completely removing the top as it makes everything much easier. You can see things as there is more light and getting the clamp band off becomes a doddle!
On the W698 there are 2x Posidrive screws around the powder draw.
The 3 bolts round the door seal are 10mm
The clip at the bottom was very easy to release using a large flat bladed screwdriver down though the pump filter access door, just press the tongue down while pulling the front panel.
The bolt head on the retaining band is 8mm. I used a 1/4" drive socket and all the extensions I have to reach it from the top. Didn't need a power tool as it is easy to spin.
While you have the front panel off, clean out the pump filter. Its much easier than trying to do it through the access door!

Adrian from deepest, darkest Warwickshire
September 2010
Hi. Our Miele 745 has stopped working during a wash, how do i open the door and empty the water out please, thanks in advance Sue

Sue Green
August 2010
I just replaced the seal on my W864 using AD King's procedure, excellant instructions.
Thank you

Tharma
June 2010
Miele 970 seal replacement
I can confirm that Neil's excellent instructions also work with the Miele 970 model, having just (March 2010) replaced a seal on this model machine. One minor addition is that, when you swing the front panel away from the body of the machine (at step 9), you will see a longish piece of plastic with a plastic ring at the end. The end away from the ring is attached to the door locking mechanism. This is the emergency, mechanical door release mechanism. When you close the front panel again, after fitting the new seal, the plastic ring has to be fed back down through a mating plastic slot near the drain tube so the mechanical pull is not trapped.

Richard
March 2010
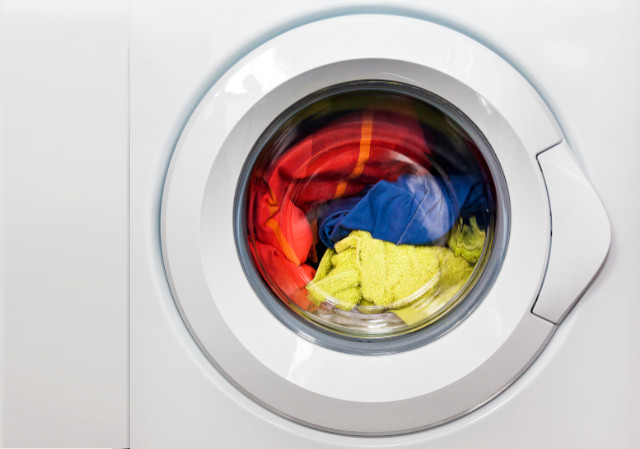
Replacing a Miele W864 Front Loading Washing Machine
Door Seal.

Extracted from an Internet article by one Neil Lewis (2007) & updated by A.D.King after an actual installation on 30-Jan-2010.

Having just done this on my own Miele W864 (A.D.King) (but virtually all Miele front loaders are similar in this respect says N.Lewis, in particular the W700, W800 and W900 series).

I recommend that only a genuine Meile replacement seal is used. After market rubber parts are not to be trusted. From experience of car parts e.g. CV joint & gear lever gaiters etc, they just don’t last. The composition of the rubber is wrong, so they harden & split in a much shorter time (say 1 year against 5-10 for the genuine item), so is a false economy, especially as this is not an easy job for an amateur. You won’t want to repeat it too often.

All procedures carried out are at your own risk of course. If you do not feel that you are competent – then get a professional engineer to carry this out.

All parts listed except for the seal obviously, are reusable.

Tools required are described within the text below.

The procedure to replace the door seal is as follows : -

1. Open the glass door & pull the machine out from under the worktop, then turn off its electricity supply by unplugging its power lead from the wall.

2. Either side of the top panel towards the front are 2 x white blanking caps. Carefully prise these off using a knife blade or similar. Remove the 2 x revealed countersunk Pozidrive screws using a small Pozidrive screwdriver. Lift the top panel & slide it back a little to free the Control panel & Soap box receptacle mouldings which are attached to the front panel. Or just take off the top panel completely, there being no other fixings other than two locating lugs at the rear.

3. Completely remove the powder dispenser drawer (it will come out so far and stop), then there is a small red button at the rear of the dispenser which you need to depress to remove it fully. You'll see this button once you've withdrawn the drawer to its stop position.

4. Now look at the front aperture of the Soap box receptacle (you have of course removed the actual drawer earlier). Remove the 3 x Torx socket screws using a size T-20 Torx bit (two either side of the aperture & one recessed in the lower LH corner).

5. Using a 10mm AF hex socket bit (if I remember rightly), undo and remove the 3 x stainless steel hex head bolts, equispaced around the chassis door seal. Note, these bolts actually secure the front panel to the machine chassis; they do not retain the door seal. So don't worry, the front will not drop off.

6. Open the square pump access door (lower left hand side of the front panel) and unclip the drain tube from its plastic retaining clip.

7. Now, you'll need to get on your hands and knees. You DO NOT need to tilt, or lift up the washing machine to do the next bit. Locate the underside of the front panel right at the bottom. You'll notice that it sticks out about half an inch or so and is proud of what I would call the kick plate which extends right down to the floor. You need to look on the underside of the front panel, about an inch or so in from the left hand edge. There you will see a spring loaded clip, which when closed, locates into a slot in the underside of the front panel. Using a stubby (short but chunky) flat bladed screwdriver, you need to carefully lever the spring clip down (to open) whilst gently pulling the whole front panel (from the left side) ajar. It will just suddenly pop out once you've done it.

8. Now carefully swing open the whole front panel. It opens like a door (hinged on the right hand side). It might be a little stiff as there are a host of leads attached to it, but it is designed to open fully (with the leads attached) to about 90 degrees.

9. Next, unseat the old rubber door seal from around the chassis aperture (door opening area on the chassis, not the front panel, obviously), so that the seal flops away from the chassis and lies just inside the machine.

10. You will notice that there is a steel round wire clamp band, holding the door seal in place around the outer static drum. On the right hand side at about the 3 o'clock position, you’ll see its tensioning screw. It’s tricky to get at & requires patience. You will need an angle drive (offset) screwdriver (e.g. Spec Tools - SkewDriver Pro http://www.spectools.com/ available from Amazon etc) for efficient removal & especially re-installation, with various length extension pieces. Power it with an electric screwdriver because the screw is very long & will take all day by hand with much swearing. Undo the screw using a 7mm or 8mm AF hex socket bit (I can’t remember which), to the screw’s max length. Try to avoid completely disengaging it from its special clasp nut, otherwise this nut & the screw’s under head plain washer will fall down into the machine. If so, locate these and retain them for later.

11. Now remove the steel clamp band by extending it to its maximum opening by moving its 2 x lugs apart. Then pull it out through the hole/door aperture in the chassis.

12. Locate the seal’s small rubber tag at about the 12 o'clock position, where the seal is attached to the outer static drum and carefully tug it. The seal will then come away from the drum. Remove the old seal completely.

13. Carefully clean around the inner rim of the outer drum to remove all trace of old soap sludge & any limescale using a suitable cleaner e.g. Viakal Limescale Remover. Lime is most likely to be found at the bottom of the rim. Clean to a depth of about ½” (finger tip depth).

14. Using your new seal, place this correctly around the drum (there is a lip on the seal and this has to go over the rim of the outer static drum. Ensure the 'tag' is at the 12 o'clock position. The seal goes over the outer drum surprisingly easily & can come away quite easily to, whilst struggling to refit the clamp band, so keep checking it’s still in position.

15. If you need to reassemble the screw into the clamp, note that the clasp nut has a chamfered corner side & a square cornered side. Ensure the nut straddles the clamp band’s round lug, with the nut’s chamfered side oriented inner most, so to prevent it cutting into the soft rubber seal.

16. Feed the assembled clamp band through the chassis & over the new seal so the screw is again positioned at the 3 o’clock position with the screw’s hex head at the top. Ensure the clamp band is located right at the back behind a little raised ridge in the seal. Check this is so all the way around. Tighten the screw in stages, rechecking the bands position each time. Power the electric screwdriver using the hex socket bit with one hand whilst holding the wire clamp band in place with the other. This is fiddly, so take your time.
Warning – get this wrong & you will flood the kitchen floor.
Warning – do not be tempted to use the optional slot in the screw, because a flat driver bit can easily slip out of the slot (guaranteed to) & will most likely stab & puncture you nice new expensive seal, rendering it useless.
Make sure that you do up the clamp band sufficiently. If you find the screw does not seem to be getting tighter in relation to how closed the clamp’s lugs are to each other, then the wire band has probably come adrift, so check before any damage is done.

17. Carefully pull the seal onto & around the front chassis aperture. When correctly installed, there should be no obvious stretching, twisting or wrinkles.

18. Reassembly of the Front & Top Panels etc is then the reverse of removal.

19. Finally, once you're done, put the machine through a few rinse cycles (where the water level is high) and look for leaks. If you have a leak, it is likely that your door seal has a rip/tear, or that it has not been correctly located around the drum - in which case you'll need to investigate.

Andrew D King

Andrew Douglas King
January 2010
I've just followed Neil's excellent instructions and successfully changed the door seal on my Miele W829.

There are a couple of minor differences for this model though:

6. On the W829 (and W840 I believe) there are actually another 2 screws near the powder dispenser drawer that must also be removed, one on each side of the drawer aperture.

11. I didn't find it necessary to completely remove the tensioning screw - it seems easier to simply loosen it the maximum allowed and then remove the steel band through the porthole.

Finally I would also add that the replacement seal should probably be lubricated with fabric conditioner (after fitting) where it makes contact with the spinning drum, or else there might be too much friction - spin the drum with your hand to check before trying a test wash. Any groaning noises or excessive resistance iindicates some lubricant might be needed.

Thanks again to Neil.

Stephen McAreavey
January 2010
I need to replace the door seal on my Meile W1514 . Do you know if its the same process? (front panel removal?)

David Meredith
January 2010
If you follow the procedure below (less removing the seal), then you'll get the front panel open).

Having just done this on my own Miele W821 (but virtually all Miele front loaders are similar in this respect), in particular the W700, W800 and W900 series. The procedure to replace the door seal is as follows:

1. Open the machine door.
2. Turn the mains power off and unplug the machine from the wall.
3. Completely remove the powder dispenser drawer (it will come out so far (and stop), then there is a small button at the rear of the dispenser which you need to depress to remove it fully, you'll see this button once you've withdrawn the drawer to its stop position.
5. Undo and remove the 3 x hexagonal head bolts surrounding the door seal (they are at approximately the 2, 6 and 10 o'clock positions). Note these bolts actually secure the front panel to the machine chassis, they do not retain the door seal. Don't worry the front will not drop off.
6. Now look at the aperture of the powder dispenser drawer (you have of course removed the actual drawer earlier). Locate the lower left hand corner of the aperture, and you'll see a recessed philips head screw in a hole. Undo and remove that screw.
7. Now, you'll need to get on your hands and knees. You DO NOT need to tilt, or lift up the washing machine to do the next bit. Locate the underside of the front panel right at the bottom. You'll notice that it sticks out about half an inch or so and is proud of what I would call the kick plate which extends right down to the floor. You need to look on the underside of the front panel, about an inch or so in from the left hand edge. There you will see a spring loaded clip which when closed is located within a slot on the underside of the front panel. Using a flat bladed screwdriver, you need to carefully lever the spring clip open whilst gently pulling the whole front panel (from the left side) ajar. It will just suddenly pop out once you've done it.
8. Open the pump access door lower left hand side of the front panel) and unclip the drain tube from its plastic retaining clip.
9. Now carefully swing open the whole front panel, it opens like a door (hinged on the right hand side). It might be a little stiff as there are a whost of leads attached to it, but it is designed to open fully (with the leads attached) to about 90 degrees.
10. Next, unseat the rubber door seal from around the door opening area (on the chassis, not the front panel, obvioulsy), so that the seal the flops away from the chassis and lies just inside the machine.
11. You will notice that there is a thin steel band holding the door seal in place around the drum. On the right hand side (at about the 3 o'clock position), you'ss see a tensioning screw for the band. With a flat bladed screwdriver undo this completely and remove the screw (it is accessible from above with a long screwdriver). Be aware that there is 1 x washer and 1 x 'nut' type fitting that will fall out when you remove the screw. Locate these and retain them for later.
12. Now extend the steel band to its maximum opening (by moving the 2 x lugs apart where the now removed screw was).
13. You can now remove the steel band. Then pull it out through the hole/door aperture in the chassis.
14. Locate the small rubber tag at about the 12 o'clock position where the seal is attached to the drum and tug it. The seal will then come away from the drum. Remove the old seal completely.
15. Using your new seal, place this correctly around the drum (there is a lip on the seal and this has to go over the lip on the drum. Remember, the seal goes on the OUTSIDE of the drum. Ensure the 'tag' is at the 12 o'clock position.
16. Reassembly is then the reverse of removal.
17. Make sure that you do up the retaining steel band sufficiently and that you correctly locate the sela on the chassis front panel (there is a groove in the seal which will locate the seal in the aperture).
18. Finally, once you're done, put the machine through a few rinse cycles (where the water level is high) and look for leaks. If you have a leak, it is likely that your door seal has a rip/tear, or that it has not been correctly located around the drum - in which case you'll need to investigate.

All procedures carried out at your own risk of course. If you do not feel that you are competent - get a professional engineer to carry this out.

Hope that helps.

Neil

Neil Lewis
August 2007
Mend Household Appliances, Washing Machines
Mend repair fix Miele washing machines

How to mend ...

Find out how to mend just about anything howtomendit.com for free repair help, information and advice.
Mend Household Appliances, Washing Machines
Mend repair fix Miele washing machines